

RetroArch, formerly known as SSNES is a powerful open source software that allows you to play many emulators and games on a device. This one is a lot different than any other emulators because unlike other emulators it allows you to include all kinds of consoles and games. That is, RetroArch is not itself an emulator, it is a front-end capable of running a lot of emulators. So, in order to do anything, you need to install the modules called “Cores” (individual emulators) in RetroArch. Remember, you must install the appropriate “cores” for the games you want to run.
Download Lively Wallpaper if you want to use gif as wallpaper!
RetroArch is fast, lightweight and you don’t need to install this on your computer, it is completely portable.
It is powered by a cross-platform API known as “Libretro“, which allows you to make cross-platform applications that can use rich features such as OpenGL, cross-platform camera support, location support, and etc.
RetroArch supports the following platforms:
- Android
- Blackberry (10/Playbook)
- GCW Zero
- Gamecube
- Javascript (ASM.js – Enscripten)
- Linux (x86 and x86_64)
- Mac OSX (Intel/PowerPC)
- Nintendo 3DS
- OpenPandora
- PlayStation Portable (PSP)
- PlayStation Vita/TV
- Playstation 3 (PS3 SDK)
- Raspberry Pi (and various other ARM hardware through Lakka)
- Wii
- Windows (32bit/64bit)
- Xbox 1 (XDK)
- Xbox 360 (XeXDK/Libxenon)
- iOS
Now let’s take a look at some of its features:
- Real-time rewinding and GGPO netplay – Libretro’s serialization support allows features such as rollback based netplay to be easily implementable. It also allows you to rewind your games in real-time.
- Multi-pass shaders (up to 8-pass) – It was one of the first programs out of the gates to have frontend shader support to begin with. RetroArch has its own shader spec that is being extensively used and implemented by various other programs unrelated to RetroArch/libretro. It is also one of the only programs of its kind that supports up to 16 shader passes along with up to 128 shader parameters supported. It also offers Game-aware shading.
- Remote networked sound support
- A built-in GUI/OSD system – RetroArch can change its entire appearance with a few button clicks. It can turn into a low-resolution but functional UI (RGUI) into a full-fledged XMB clone, and so on.
- Impeccable Linux support – RetroArch was first out of the gates in many respects with support for Wayland, DRM/KMS, and many other graphics technologies which are still not standard in many Linux programs. It is designed to be as dependency-less as possible while also making it possible for custom-made versions of RetroArch to be made with specific support for several new APIs. Unlike many other programs, Linux is not treated as a second-class citizen but as the first-class citizen.
- Impeccable backward compatibility
- A cross-platform game console
RetroArch designed with gamepad navigation in mind but it does have the keyboard support. So, here are the keyboard controls:
Keyboard Controls
- Move cursor up/down/right/left – Up/Down/Right/Left Arrow
- Scroll one page down – Page Down
- Scroll one page up – Page Up
- Select – Enter
- Return to the previous screen – Backspace
- Help – Shift
- Reset to default or Fast forward toggle – Spacebar
- Search – Foreward Slash
- Exit RetroArch – Esc
- Menu toggle – F1
- Save state – F2
- Load state – F4
- Decrease current state slot – F6
- Increase current state slot – F7
- Take screenshot – F8
- Mute – F9
- Grab mouse – F11
- Show on-screen keyboard – F12
- Volume Up – Plus
- Volume Down – Minus
- Fast forward hold – L
- Rewind – R
- Movie record – O
- Pause – P key
- Frame advance – K
- Reset – H
- Next shader – M
- Previous shader – N
- Netplay toggle play/spectate – I
- Slow motion -E
Now let me show you how to use this amazing program.
How To Use RetroArch (Windows)
First, download RetroArch onto your computer. Then extract the files into a folder. Now double-click on the retroarch.exe file and run it on your computer, you will see a window as shown below.
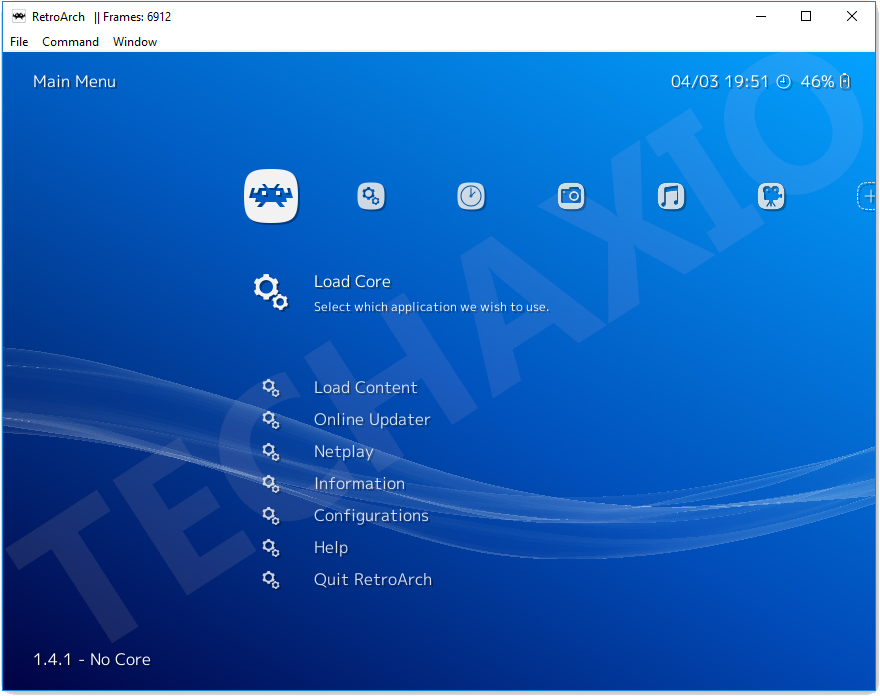
Now use the keyboard (arrow keys, enter key, and backspace) or the mouse to browse to Online Updater > Core Updater.
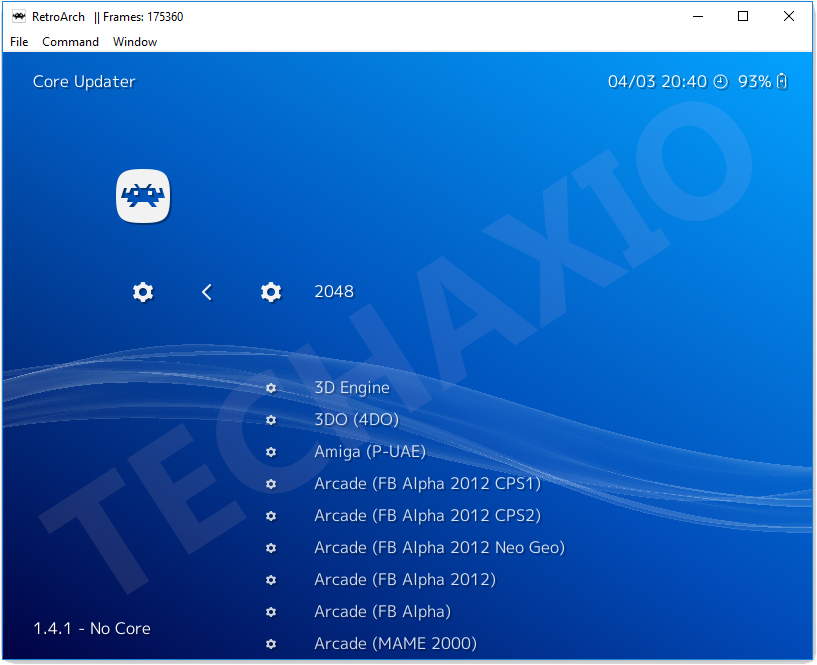
Now select the emulator you want and then hit the Enter key to download and install it into RetroArch. After downloading it, go back to the main menu and select “Load Core“, then select the emulator you want to run and hit the enter key (or just click on it).
Then go back to the main menu and select “Load Content“.
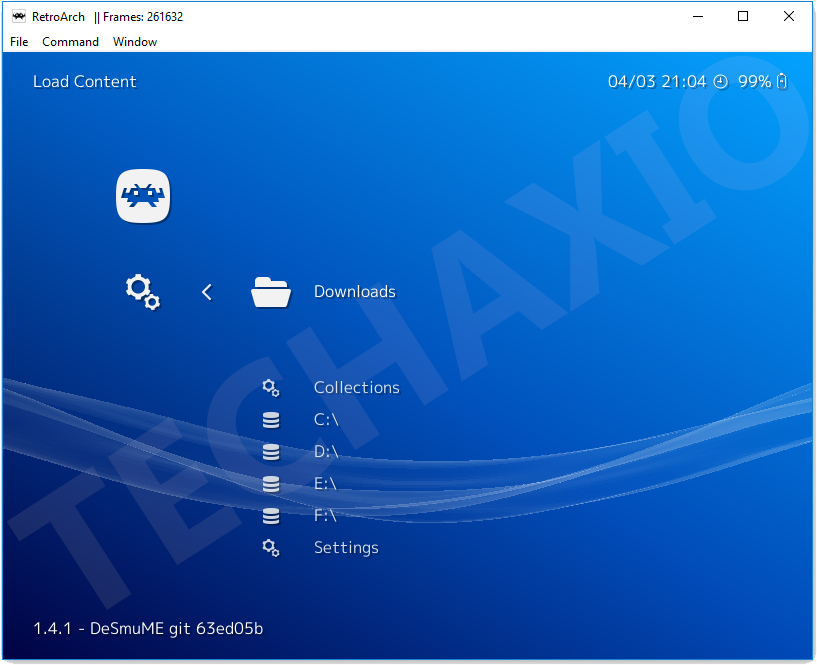
Now select the ROM.
ROM – ROM is a ripped copy of the actual game cartridge or disc.
As soon as you select the ROM, the game will open up and ready for you to play!
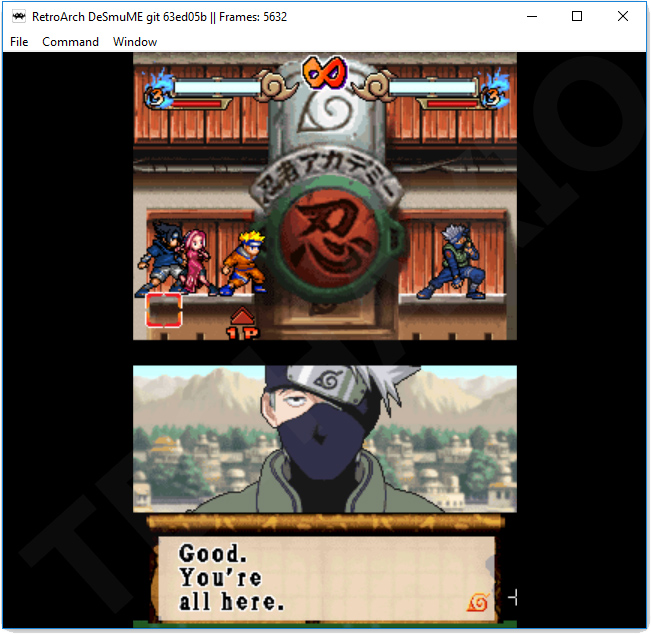
Here is a screenshot of Naruto Ninja Council 3 running on RetroArch:
You can use the mouse and keyboard to play the games. But if you want to use your Controller to play games, then you must configure the RetroArch. It is very easy to do, but anyway here is a quick guide on how to configure RetroArch to work with a Controller:
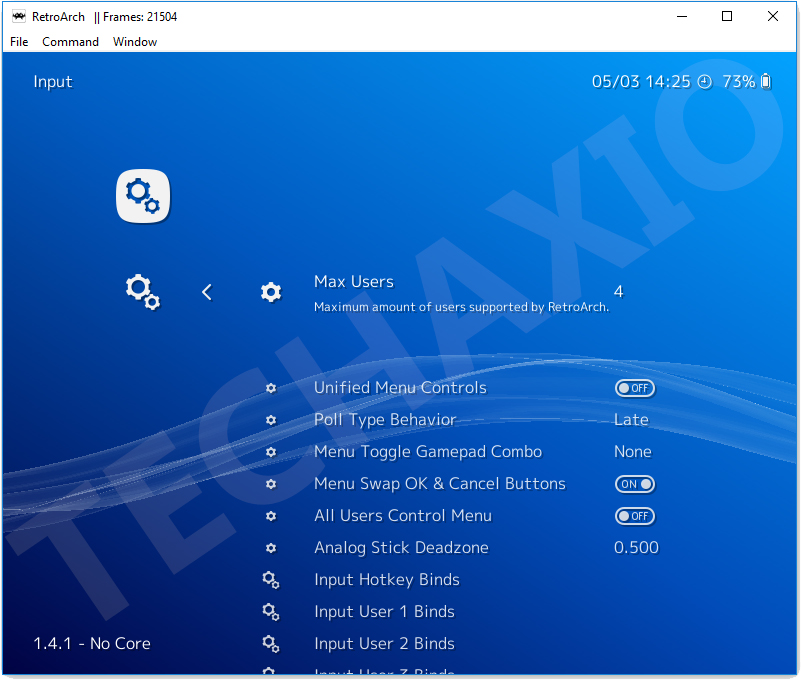
First, connect the Controller to the computer. Then go to the Settings menu (press the right arrow key from the main menu), and then select “Input” and hit the enter key.
Note: XBox 360 controllers works out-of-the-box.
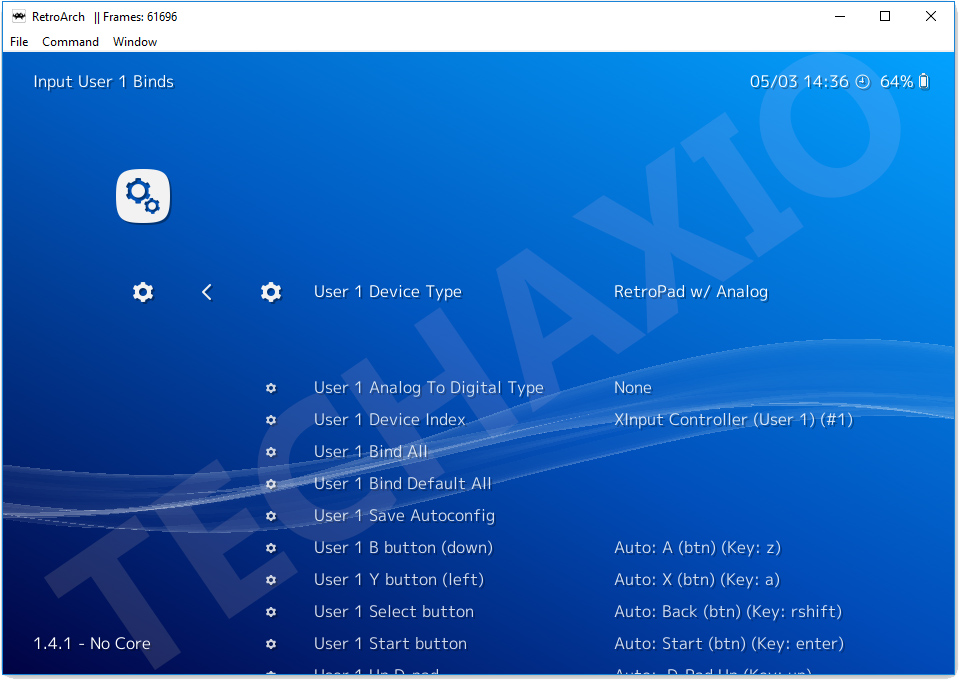
Now scroll down and select “Input User 1 Binds” and press the enter key.
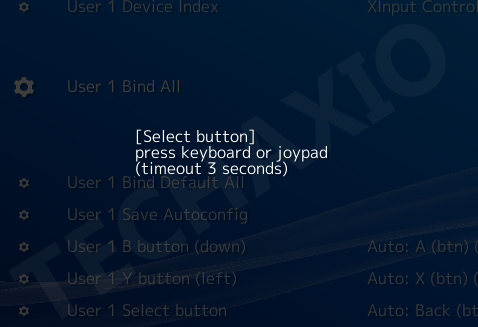
Then select “User 1 Bind All“. Now the RetroArch will ask you to press some buttons in the Controller, do it.
If you do that, your Controller will be properly configured with the RetroArch. Ready to play!
There are a lot of other features that I haven’t touched, so feel free to check that out.